Admittedly it’s been almost 4 weeks since I posted a recipe. I am borderline disappointed with myself, therefore I went big on this first post back. It’s more complex than my normal posts, but still super easy. You’ll just need a couple moulds (links are within the method for the cheesecake layers), but you could also do nice swirls or layers in a tart tin.
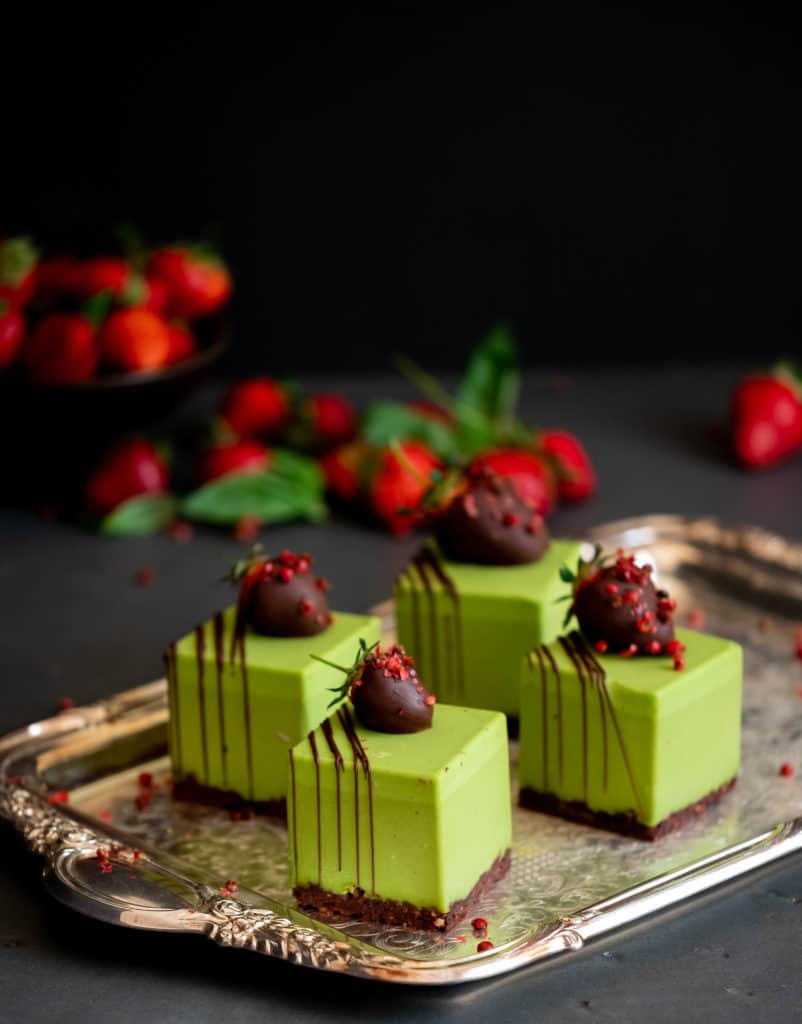
The flavour combo here is classic as it comes — strawberry, basil and chocolate. Yup. Winner, winner, tofu dinner! And them colour pops?? Stop. Just stop. It’s so Summery I can’t deal with it.
Cashew Cream Cheese
250g (1 ¾ cups ) cashews, soaked
1 tsp probiotic powder
100g ( 3.5 oz ) water, or just enough to blend
Method
- Blend the cashews with the probiotic powder and just enough water to create a thick mixture.
- Transfer to a mixing bowl, press cling film or greaseproof paper right down on top of the mixture so as to not form a crust on top and pop in a warm space for 12 – 24 hours.
- The mixture should be aerated and slightly sour smelling when you check on it.
Cheesecake Fillings
Base Cheesecake Layer
1 recipe fermented cashew cheese
100g ( ½ cup ) xylitol
30g ( 2 tbsp ) lemon juice
150g ( ¾ cup ) coconut oil, melted
20g ( 2 tbsp ) cacao butter, melted
½ tsp vanilla extract or 8 drops medicine flower extract
¼ tsp sea salt
Basil Layer
½ recipe base cheesecake
40g fresh basil, blanched and pressed to remove excess water
Strawberry Layer
½ recipe base cheesecake
8 drops strawberry medicine flower extract (optional)
½ – 1 tsp beetroot powder ( optional for colour )
1 tbsp freeze dried strawberry powder
Big handful fresh strawberries, diced
Method
- Blend all ingredients for the base cheesecake in the Vitamix or high speed blender of your choice.
- It’s best that the cashew cheese is at room temperature before doing this, otherwise the oil will seize when you add it to the cold cheese.
- If the mixture gets very thick and lumpy, it means the coconut oil has hardened, simply tamer the mix into the blades on high speed until it warms and becomes silky smooth and creamy.
- Remove ½ the mix from the blender and add the basil ingredients. Blend until basil is broken down completely.Pour enough basil mixture into the larger square mould ( this is the one I used ) to cover the bottom about ¼ inch. Carefully place in the freezer to set being sure it’s kept level. Reserve the remaining basil mixture in a contain in the fridge.
- Clean the blender and add the other ½ of the base cheesecake along with the strawberry layer ingredients, except the fresh strawberries.
- Fold the chopped strawberries through the cream and pour the mixture directly into the smaller square mould and freeze solid. This is the mould I used.
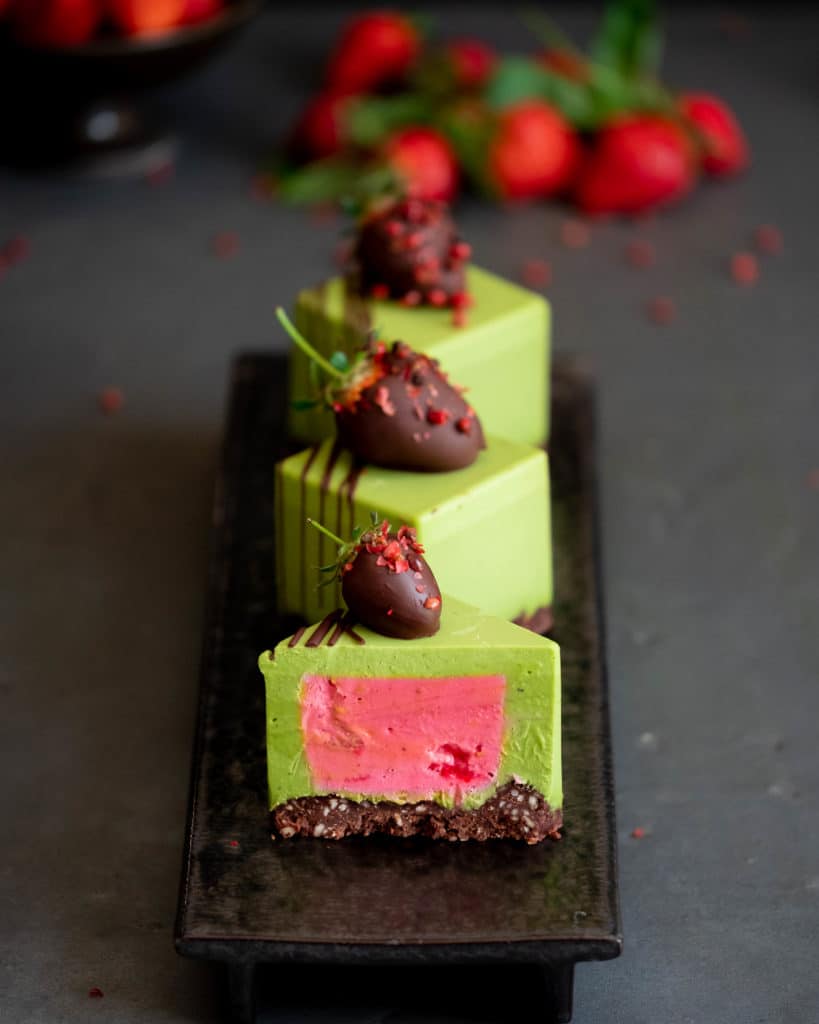
- Once the strawberry squares are 100% frozen, remove from the mould, trim about ¼ inch off and place atop the centre of the basil layer.
- Melt down the basil layer ( that you put in the fridge and which will now be firm ) over a double boiler. Don’t warm it up, just melt it down very gently so it’s pourable.
- Pour the basil cheesecake on top of the strawberry to cover the sides and the top, but leave space for the crust layer, about ¼ inch or so.
- Place in the freezer for 30 minutes. Once the basil layer you just poured is set, press the chocolate crust on top (see below) and allow them to freeze solid before popping out of the moulds.
Chocolate Crust
100g ( ¾ cup ) ground almonds
35g ( 3 tbsp ) coconut sugar
25g ( ½ cup ) cacao powder
½ tsp tamari ( optional )
20g ( 2 tbsp ) cacao butter, melted or softened
15g ( 1 tbsp ) water, or as needed just to bring together
Method
- Process crust ingredients, except water and cacao butter, in the food processor until crumbly, but still with some texture.
- Add cacao butter and water and process just to combine.
- Press the mixture onto the surface of the cheesecake squares, pressing gently to ensure it holds when set.
- Pop them out and transfer to a container in the fridge for up to 3 days as the colours will begin fading after that. You can also keep them in the freezer till you’re ready to serve them.
- Garnish with chocolate dipped strawberries sprinkled with pink peppercorns and chocolate drizzle over the cakes, if desired.
FREE Videos: Start watching and learning today
Are you a visual learner? Yeah, me too. If I can’t be there in person, I love a video. This FREE mini series covers everything you need to know in order to start making professional quality chocolate at home with ease.
Want to know when a new recipe is posted?
You’re busy. I know this. You can’t keep checking my site for new recipes. Sign up for my newsletter and I’ll send you a new recipe every week. Boom!