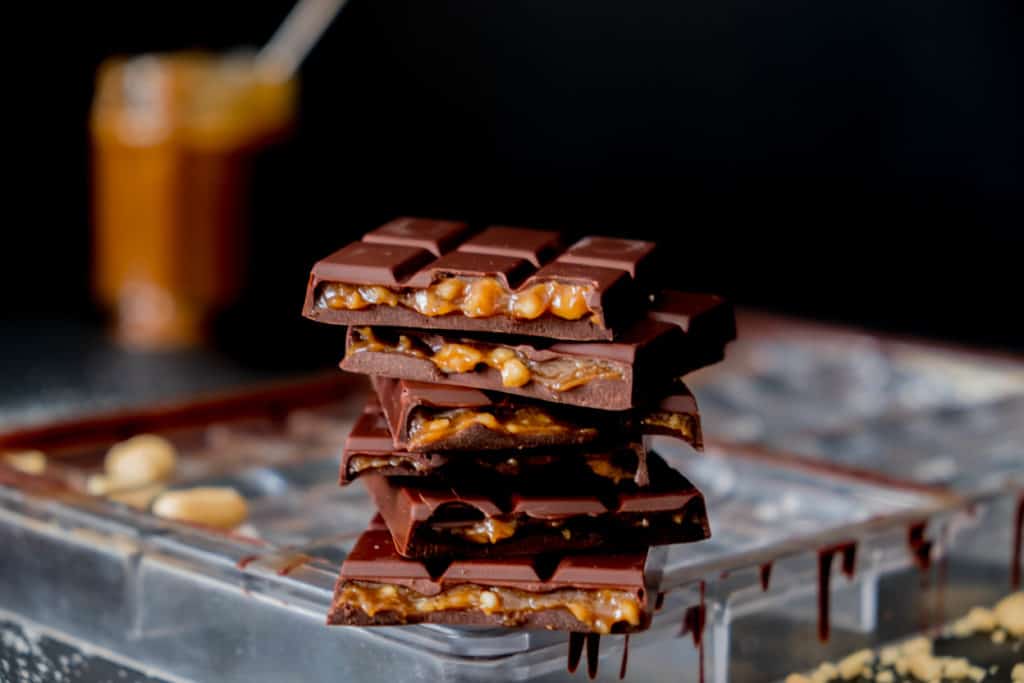
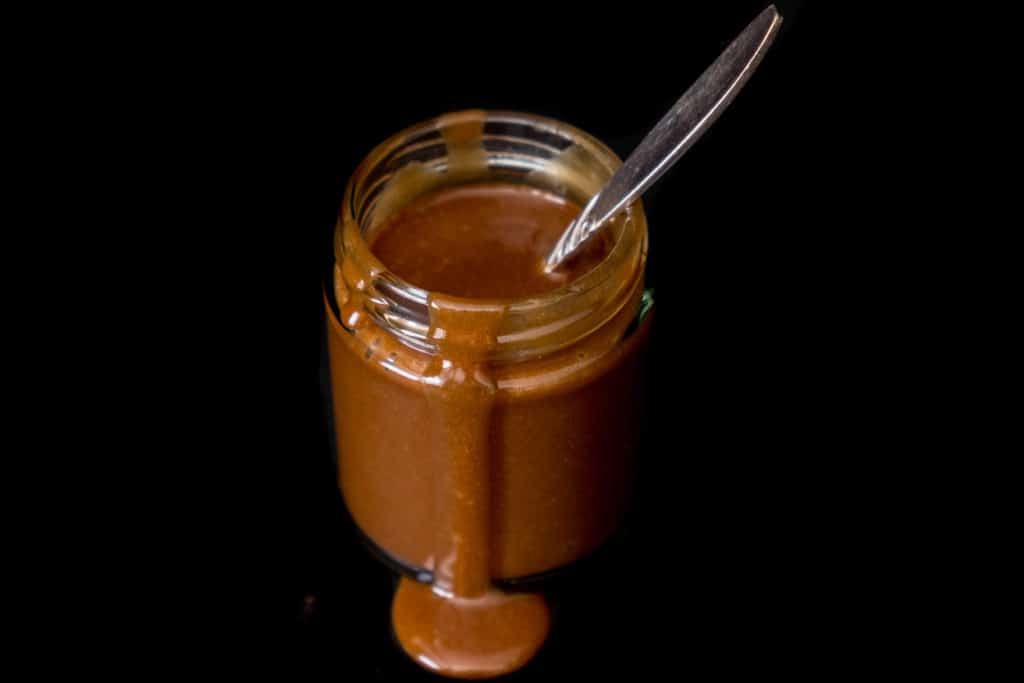
Raw caramel is quite an elusive product in the raw food world. Many attempts have been made to create a raw caramel that mimics “real” caramel in its sticky, stretchy characteristic. Truth is, without caramelising the sugar ( using heat ) it won’t achieve that stretchy texture we all know and love. But what this caramel recipe lacks in stretch, it makes up for in its consistency ( ability to set firm ) and flavour, which tastes very similar to actual caramel. This recipe is versatile as all heck – you can freeze it, roll into balls and dip in chocolate. Keep it at room temp and it’s gooey like “real” caramel. It’s a true delight and a recipe you’ll see used throughout my posts as both a key element and an accent.
Salted Peanut Caramel
Peanut butter can be removed completely or subbed for any other nut butter you desire.
50g ( ¼ cup ) coconut oil, melted
35g ( 2 tbsp + 2 tsp ) cacao butter, melted
40g ( 2 tbsp ) peanut butter
15g ( 1 tbsp ) lucuma powder
15g ( 1 tbsp ) mesquite powder
35g ( ¼ cup ) xylitol
35g ( ¼ cup ) coconut sugar
1 tsp tamari
½ tsp sea salt
35g ( ¼ cup ) warm water
Method
- In a blender, combine the first set of ingredients on low-med speed.
- With the blender running, slowly drizzle in the warm water and watch it emulsify ( because it’s fun to watch it go silky smooth and shiny )
- At this stage you can transfer the caramel to a container or bowl, mix through a handful of finely chopped peanuts and put to one side, at room temp, to cool while you get the chocolate items ready.
Next, you’ll need to make your chocolate. Click here for a free mini chocolate course on how to make a basic batch of dark chocolate ( and temper it ) at home.
Making a hollow, filled bar
- Use a poly/professional (hard) mould to make hollow objects; silicone is too flimsy for this method .
- Polish your mould, as usual, and make sure it’s at room temperature ; not warm out of the dehydrator and not cold from the fridge.
- Your chocolate should be thick, but have some working time left in it, temp wise, we want it to be around 26°c /78°f however, the actual thickness is more important here than the temp. Work by eye.
- If you are using chocolate which has been conched or stone ground, the working temp will be around 28°c – 30°c.
- Be set up (see video); have a large bowl or a big baking pan ready which is clean and dry, have your bench scraper, spatula and ladle or measuring cup ready.
- Tilt your mould on a slight angle, using the ladle measuring cup, fill the cavities of half of the mould, tap the side of the mould with your bench scrapers handle to release any air bubbles and to allow the chocolate to settle.
- In one quick movement, turn the mould upside down over the baking pan or your bowl of chocolate, and keep it inverted while you tap it again with the handle of your bench scraper and scrape the excess chocolate away (see video) you may need to repeat this step a few times.
- Do not turn the mould right side up until the chocolate has lost it’s shine and has begun to set. You can place the mould, inverted, over a bowl or large container.
- If you feel the shell is not thick enough, repeat the first steps again until you are happy with it.
- Once the chocolate has lost its shine, while still being inverted, turn it right side up and pipe or spoon in the caramel.
- Don’t fill the shells beyond 2/3 as you need some room at the top to add some chocolate at the end.
- Once all the cavities are filled, top up with some chocolate, tap gently to remove air bubbles and then set in the fridge for 5 minutes.
- Remove from fridge and allow to set at room temp for an additional 15-20 minutes depending on the room temp.
- Wearing a pair of plastic or latex gloves to avoid finger prints, invert the mould onto a cutting board or baking pan to avoid them falling out onto a surface and getting smashed.
![]()
FREE Videos: Start watching and learning today
Are you a visual learner? Yeah, me too. If I can’t be there in person, I love a video. This FREE mini series covers everything you need to know in order to start making professional quality chocolate at home with ease.
Want to know when a new recipe is posted?
You’re busy. I know this. You can’t keep checking my site for new recipes. Sign up for my newsletter and I’ll send you a new recipe every week. Boom!