After last weeks colourful Blueberry Matcha Tart, I wanted to keep playing with colours and I love a cookie sandwich. Who doesn’t ?!
I remember eating Oreo’s as a child and loving the deconstrution of the cookie. Which side the cream stuck to when I’d twist the cookies, scraping the cream off with my top teeth and saving the dark chocolate cookies as the main star of the show. Rarely did I eat the cookie in a traditional bite, but I am pretty sure everyone has their Oreo cookie story from being a kid.
So, not only are these cookies stunning to look at, but they bring back childhood memories for almost anyone and that’s a beautiful thing.
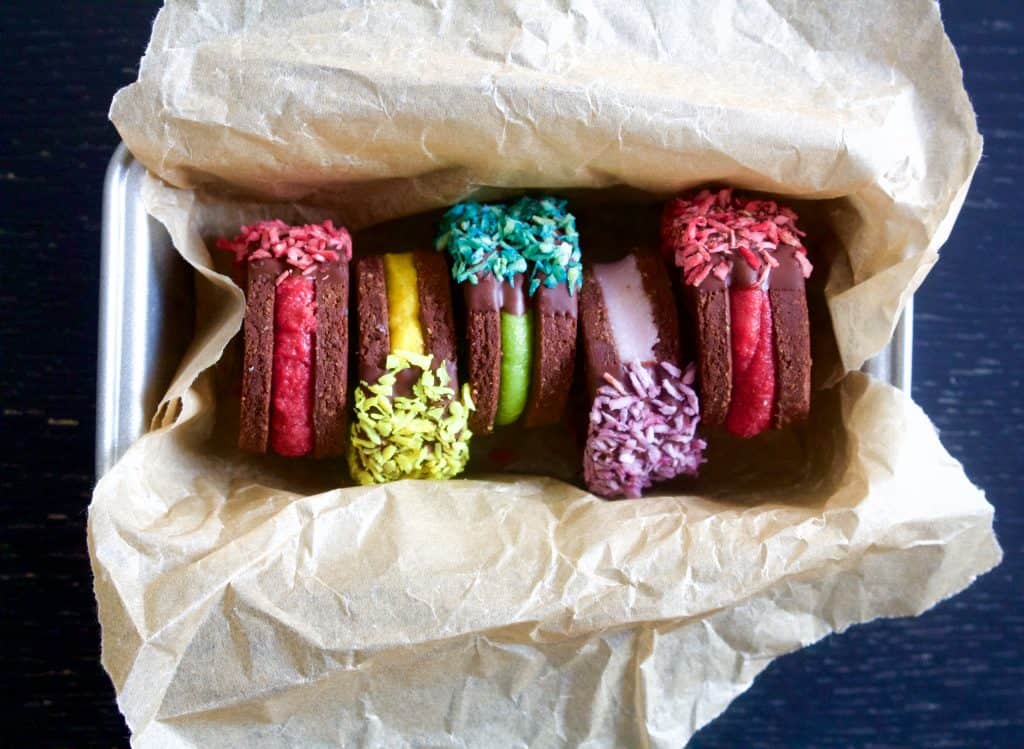
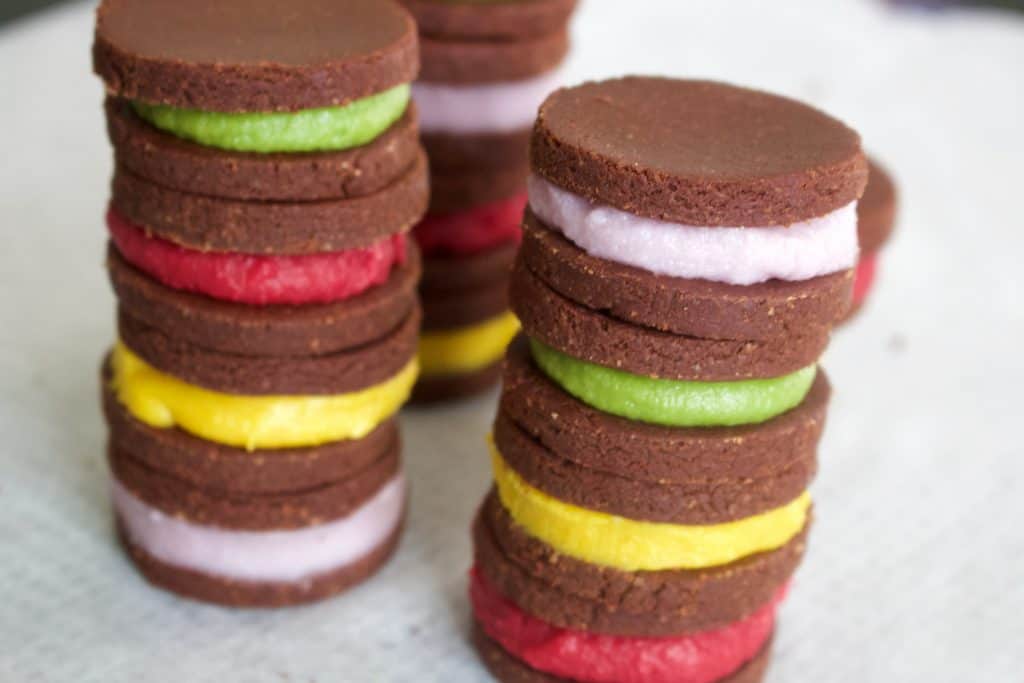
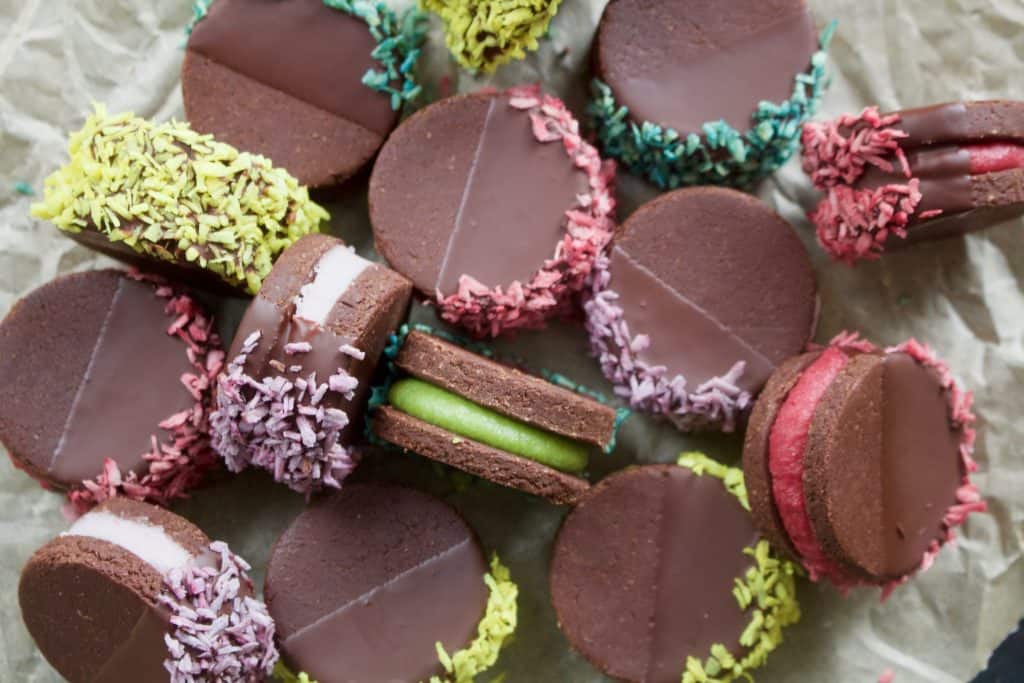
You can simplify these cookies by simply filling them with frostings and leaving it at that ( as pictured below ), or you can go the whole 9 yards and dip them in chocolate and garnish with coloured coconut. Either way, they are gorgeous to look at and a true delight to devour.
Chocolate Cookie
120g ( 1 cup ) ground almonds
100g ( ½ cup ) coconut sugar
140 g ( 1 cup ) oat flour
65g ( ⅓ cup ) lucuma
100g ( 1 cup ) cacao powder
50g ( ¼ cup ) maple syrup
2 tsp tamari
70g ( ⅓ cup ) cacao butter, melted
80g ( ⅓ cup ) water, or as needed
Method
- In a food processor blend the first set of ingredients just to combine well.
- Add the cacao butter and a little water at a time until the mix comes together into a ball, but not a very wet one. You’ll be rolling this dough out, so it should be firm but moist.
- Roll the dough out between two pieces of teflex or greaseproof paper to a ¼ -⅓ inch thickness or so.
- Using a cookie cutter or a ring mould cut into 1 ½ – 2 inch rounds in diameter and place onto a greaseproof paper lined tray.
- Repeat until all the dough has been used up and then pop the tray of cookies into the fridge to set firm – this only takes about 15 minutes.
- Make the frostings while they set.
Icing / Filling
100g ( ⅓ cup ) coconut butter, softened
50g ( ⅓ cup ) xylitol, cane sugar (powdered) or honey ( can also omit sweetener )
25g ( 1 ½ tbsp ) coconut oil, softened or melted
80g ( ⅓ cup ) water, room temp or slightly warm
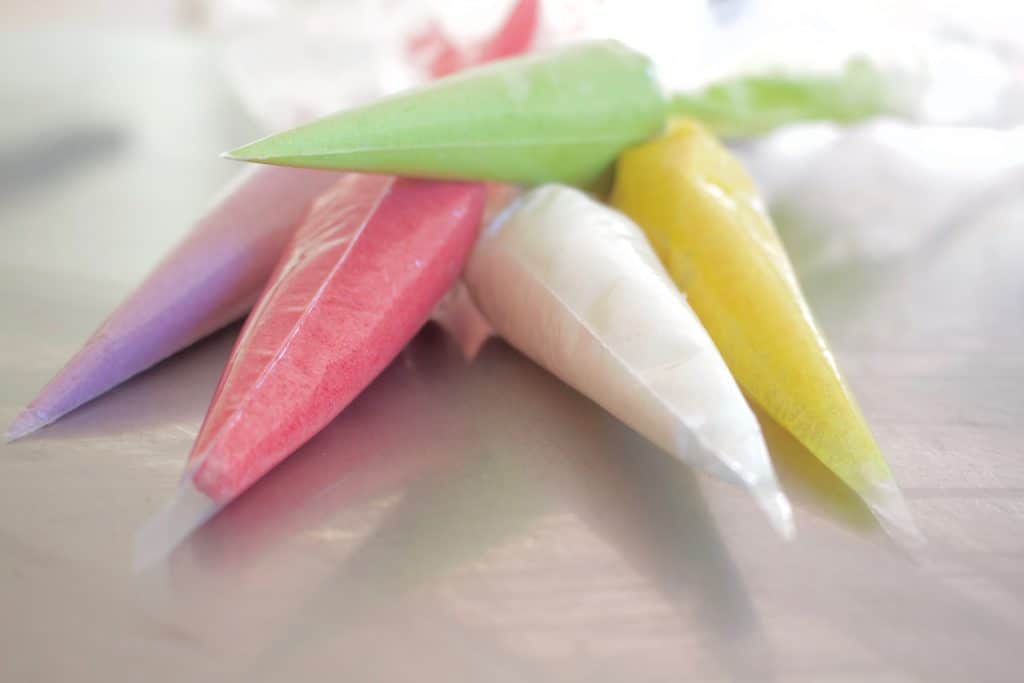
Colours
- Yellow – turmeric
- Red/Pink – freeze dried raspberry powder or strawberry powder, dried beetroot powder
- Purple – freeze dried beetroot powder
- Greens – matcha tea powder, spirulina, chlorella powder
Method
- In a blender combine the first set of ingredients at low speed, just so they incorporate.
- With the blender still running on low, drizzle in the water. Scrape the sides of the blender as needed to be sure it’s all fully incorporated.
- Divide the mix between the amount of bowls you’d like to add colour to, alternatively, you can keep it white. If you are only making one colour, simply add it to the full batch in the blender.
- Add your colourant of choice, start with a little bit so you can get a feel of how much of an impact it will have. You can always add, but you can’t take away.
- The icing will thicken as it cools, so feel free to warm it over a bowl of hot water or in the dehydrator to keep it at a nice working temp. It shouldn’t be super runny, but a little loose.
Coloured Coconut
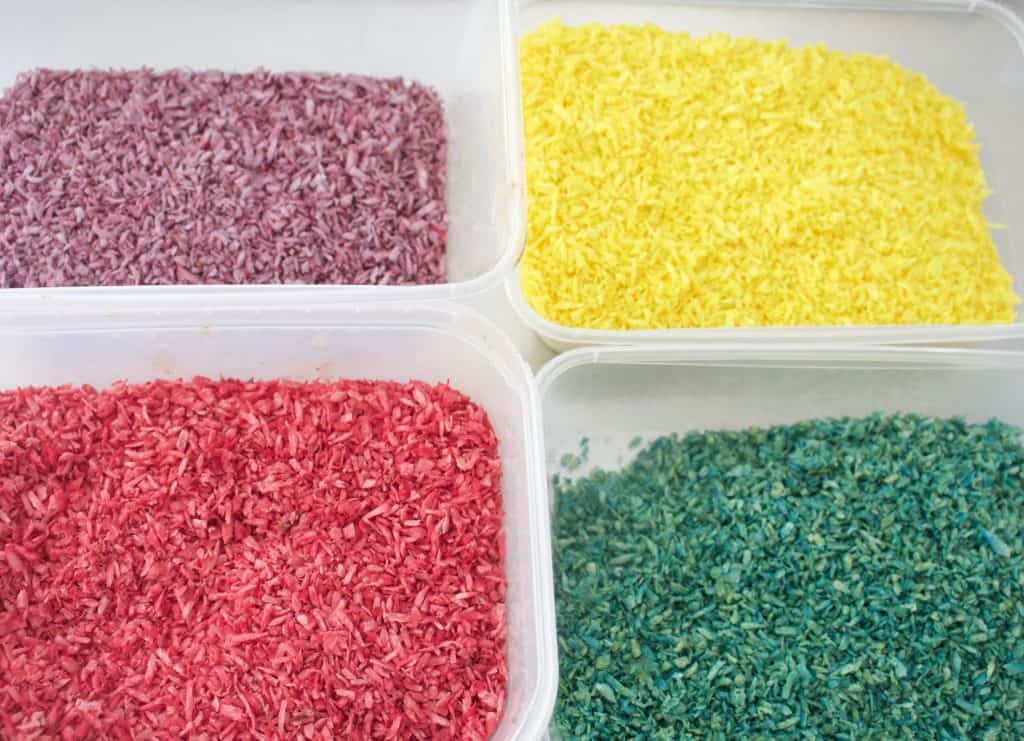
300g ( 3 cups ) desiccated / shredded coconut
Water to cover the coconut
Colours
- Yellow – turmeric
- Red/Pink – freeze dried raspberry powder or strawberry powder, dried beetroot powder
- Purple – freeze dried beetroot powder
- Greens – matcha tea powder, spirulina, chlorella powder
Method
- Soak the coconut in enough water to cover for about 1 hour.
- Strain the coconut and split it evenly between a few bowls you’d like to colour. I did purple, pink, yellow and green. You want the colours to match the colour you’ll be making the icing.
- As with the icing colouring, add a little of your prefered colour at a time until you reach the colour you’d like. It’ll be slightly darker once it’s dried and cooled.
- Spread the coconut out on teflex lined dehydrator trays and dry at 115f for 8 hours or until it’s completely dry – this doesn’t take too long.
- Once cool, store for months in an airtight container out of direct sunlight (it’ll dull the colour).
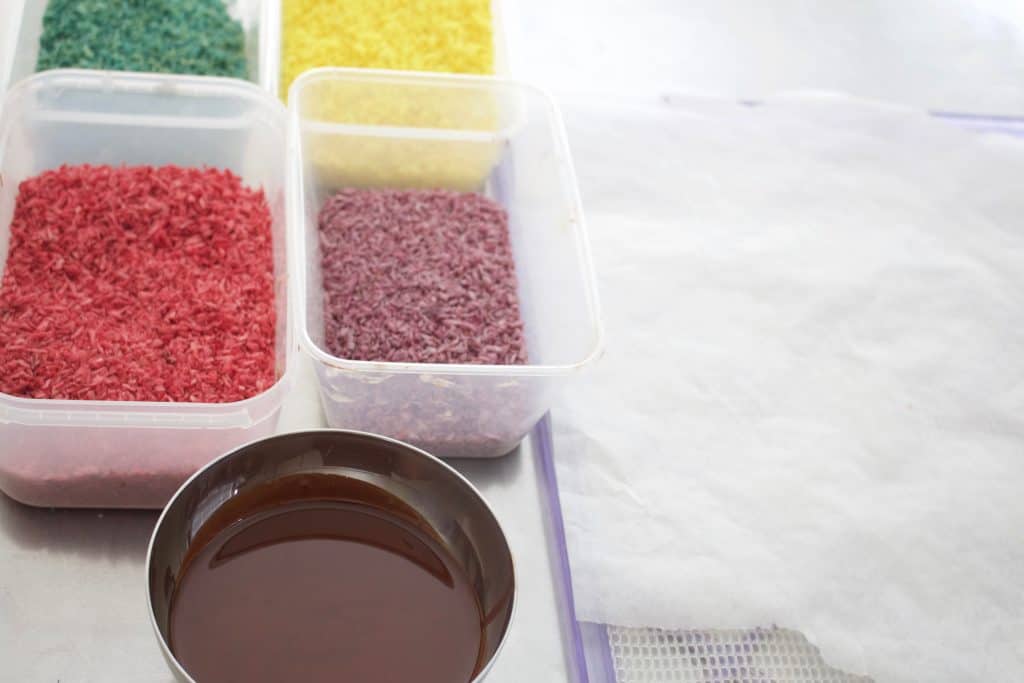
Assembling the cookies
250g ( 1 1/2 cups ) dark chocolate or cacao paste, melted
Coloured coconut to match the icing colours
Cookies – set and right out of the fridge
Icings – ready in bowls with tea spoons or disposable piping bags ( as seen above )
An empty tray to set the cookies on
A clear space in the fridge that the tray of completed cookies will fit on
Method
- Line the cookies on a large tray in pairs upside down, one will be the bottom and one will be the top.
- Using a teaspoon, dollop a small amount of icing in the centre of the cookie and then gently press it’s pair on top and press so that the icing fills out evenly. This takes a little practice.
- Continue until all cookies are used.
- Place in the fridge or freezer to set up – about 5-10 minutes.
- Once they are firmly set, place them on your left and have your coloured coconut and melted chocolate in front of you and an empty tray to your right to set the completed cookies on.
- Half dip a cookie into the chocolate and then allow the excess to drip off.
- Roll that dipped side of the cookie in the corresponding coloured coconut and then place it on the prepared sheet to your right.
- Repeat with all the cookies, set in the fridge – about 10 minutes – and then store in an airtight container for up to 1 week in the fridge or a few months in the freezer.
FREE Videos: Start watching and learning today
Are you a visual learner? Yeah, me too. If I can’t be there in person, I love a video. This FREE mini series covers everything you need to know in order to start making professional quality chocolate at home with ease.
Want to know when a new recipe is posted?
You’re busy. I know this. You can’t keep checking my site for new recipes. Sign up for my newsletter and I’ll send you a new recipe every week. Boom!