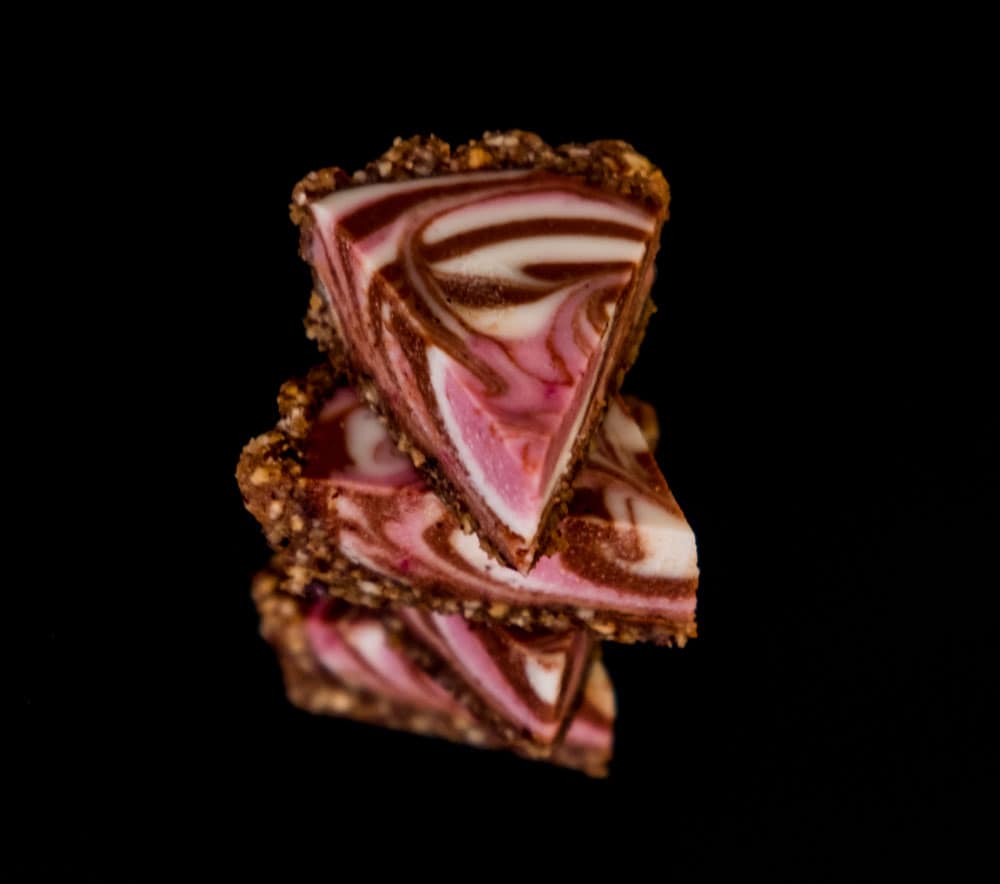
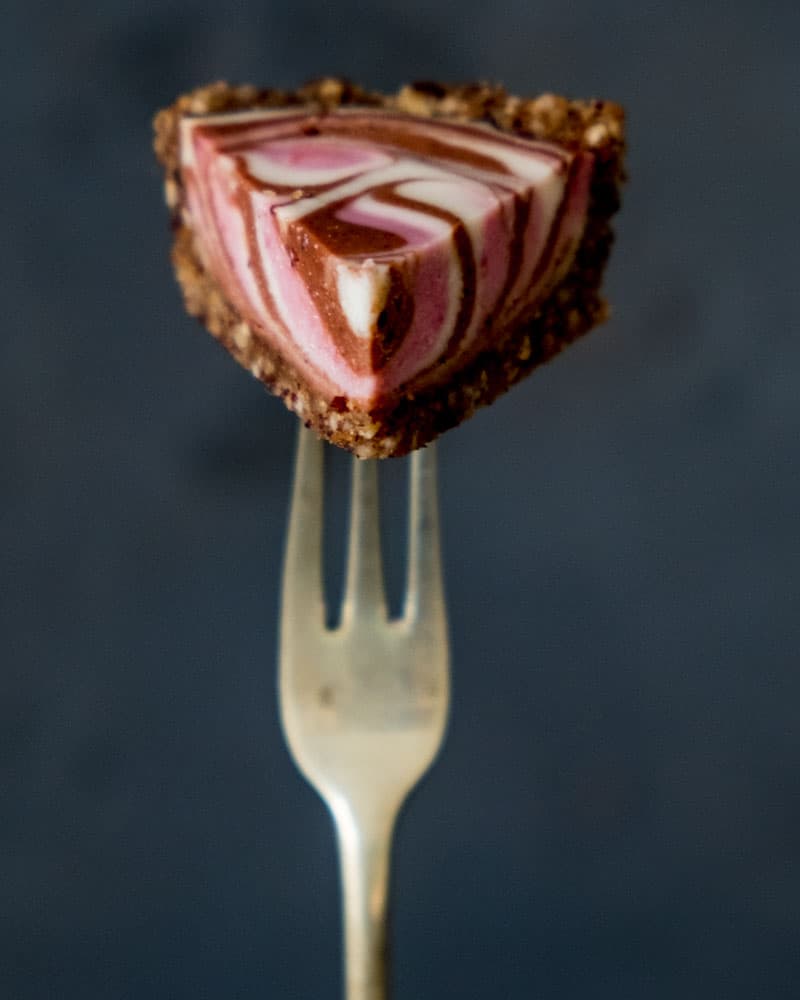
This raw, fermented cheesecake has become a staple in my live Raw Cake Classes over the past couple of months. The swirls, the flavours and the crunchy crust make this cheesecake a sensation!
Don’t let the word ‘fermented’ put you off! It’s a super easy process and well worth the little extra effort for the added health benefits. Fermenting the nuts makes them more easily digestible to the body. PLUS you get the added benefit of all that friendly bacteria doing the happy dance inside your body… dessert with a purpose, baby!
Fermented Cheese
250g (1 ¾ cups ) cashews, soaked
1 tsp probiotic powder
100g ( ⅓ cup ) water, or just enough to blend
Method
- Blend the cashews with the probiotic powder and just enough water to create a thick mixture.
- Transfer to a mixing bowl, press cling film or greaseproof paper right down on top of the mixture so as to not form a crust on top and pop in a warm space for 12 – 24 hours.
- The mixture should be aerated and slightly sour smelling when you check on it.
Nut Crust
6 inch tin
200g ( 1½ cups ) activated almonds, pecans or hazelnuts
35g ( 3 tbsp ) coconut sugar, powdered
1 tsp vanilla powder or extract
25g ( 3 tbsp ) coconut oil or cacao butter, melted
10g ( 1 tbsp ) water, or as needed just to bring together
Method
- Process crust ingredients, except water and coconut oil, in the food processor until crumbly, but still with lots of texture.
- Add coconut oil and water and process just to combine.
- Line the bottom of a spring form pan with cling film and press the crust into the pan, bringing the crust up the sides if that is the type of base you desire. Press the crust so it’s rather compacted.
- Place to the side whilst you make the cheesecake fillings.
Cheesecake Fillings
1 recipe cashew cheese (above)
100g ( ½ cup ) xylitol, powdered
40g ( 3 tbsp ) lemon juice ( reduce if desired )
150g ( ¾ cup ) coconut oil, melted
1 tsp vanilla ( optional )
Strawberry Layer
1-2 tbsp freeze dried strawberry powder
5 drops strawberry medicine flower extract ( optional for flavour )
Chocolate Layer
30g ( 2 tbsp ) chocolate powder
50g ( ¼ cup ) coconut sugar, powdered
1/2 tsp tamari
Method
- Blend all ingredients in the food processor. It’s best that the cashew cheese is at room temperature before doing this, otherwise the oil will seize when you add it to the cold cheese.
- If the mixture gets very thick and lumpy, it means the coconut oil has hardened, simply allow the food processor to run for 3-5 minutes to warm the mixture and make it smooth again.
- Split the mix evenly between 3 bowls. Place one of them to the side as your vanilla layer.
- Add one of the bowls back to the food processor and the ingredients for the strawberry mixture. Process to combine and then pour this mixture back into the bowl.
- Pour the other bowl of vanilla mixture into the food process and add the ingredients for the chocolate layer. Process to combine.
- Place a scoop of vanilla in the centre of the crust, then a scoop of chocolate inside the scoop of vanilla. If the chocolate doesn’t push the vanilla out, then tap the tin to force it.
- Place a scoop of strawberry inside the scoop of chocolate and, again, tap if needed. Repeat this process until all mix is gone.
- The smaller the scoop you use, the more impressive the zebra effect will be. Be sure to use the same size scoop throughout to maintain an even appearance.
- Gently tap the tin to incorporate the three mixes.
- Place in the fridge or freezer to set – about 2 – 4 hours.
FREE Videos: Start watching and learning today
Are you a visual learner? Yeah, me too. If I can’t be there in person, I love a video. This FREE mini series covers everything you need to know in order to start making professional quality chocolate at home with ease.
Want to know when a new recipe is posted?
You’re busy. I know this. You can’t keep checking my site for new recipes. Sign up for my newsletter and I’ll send you a new recipe every week. Boom!