Back in my early days of being a chef, I worked the breakfast shift. Which meant arriving at 5am to make baked goods for our customers. Scones used to be a staple for me, I loved making them. Most chefs don’t like baking, but I always enjoyed the result and, especially, how much people appreciated freshly baked goods.
I’ve wanted to re-create them in raw form for many years and didn’t have the right recipe or technique just yet. But after the banana bread post, I thought that base would work well, and it does.
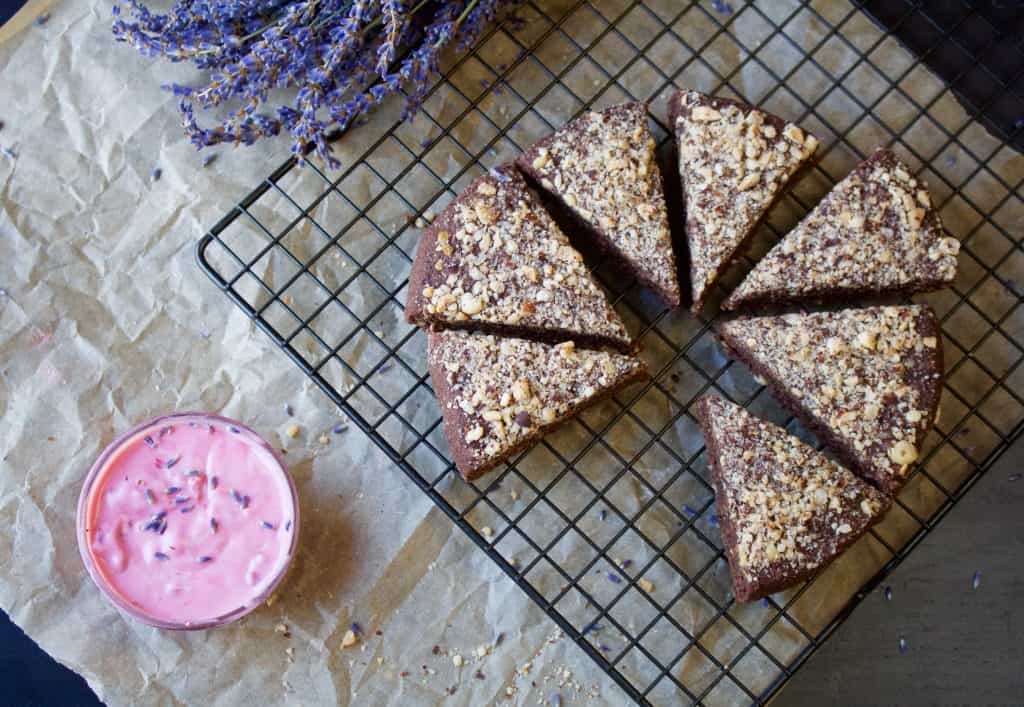
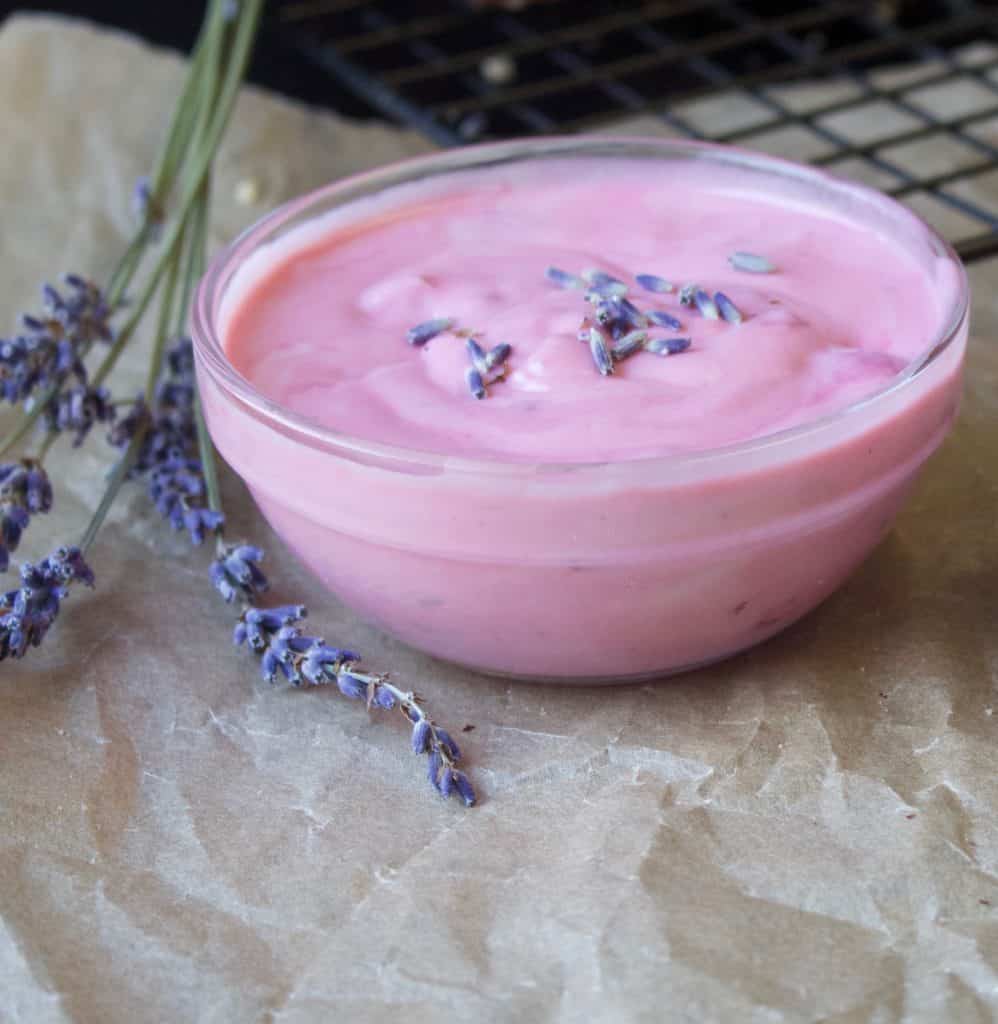
The raspberry lavender yogurt is a lovely companion as it brings freshness and lightness to the scone. Cutting through the chocolate and nuts to bring fruit, lightly floral balance. The combo hits all the marks. I know lavender is not everyone’s cup of tea, but, I’m telling you, it brings the sunshine to every bite. You could also have the scones with crushed fresh berries, if making the cream cheese feels too much of an effort.
125g ( ¾ cup ) buckwheat – soaked 1 hour and sprouted 10-12
50g nut butter – cashew and almond work well
250g ( 2 cups sliced) courgette/zucchini, peeled and chopped
100g ( ½ cup ) water
50g ( ½ cup ) cacao/chocolate powder
1 tsp apple cider vinegar
½ tbsp tamari
100g ( ½ cup ) coconut sugar
45g ( ¼ cup ) cold pressed oil – hazelnut, sesame and walnut work well
50g ( ¾ cup ) psyllium husk
30g activated nuts
100g ( ¾ cup ) almonds ground
20g ( 1 ½ tbsp ) coconut flour
50g ( ½ cup ) activated nuts, processed into a crumb consistency – optional
Method
- In a high speed blender combine the first set of ingredients and blend on high until smooth.
- Add the psyllium and activated nuts (optional, but recommended for texture) and pulse in the blender just to break the nuts down a bit and mix through the psyllium.
- In a bowl, mix together the ground almonds and coconut flour with your hands.
- Add the contents of the blender to the mixing bowl with the flours and mix well with your hands to combine.
- Allow the mix to sit 2-5 minutes, during this time it will firm up as the psyllium and coconut flour absorb moisture.
- Dampen your hands and form the dough into a ball.
- Dampen your hands again and press the dough into a 1 1/2 – 2 inch thick round.
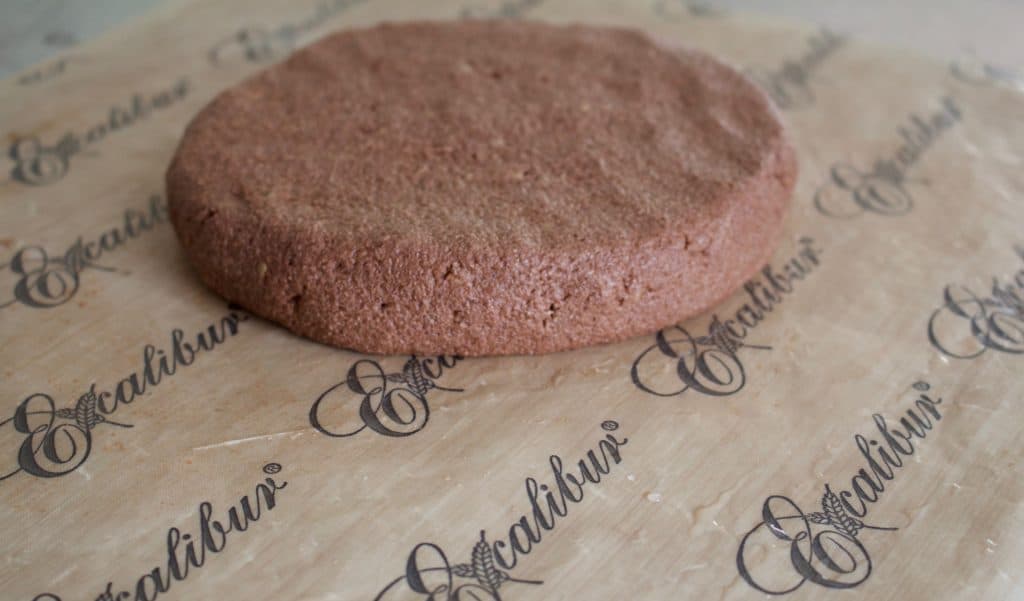
- Gently press chopped nuts on top so they adhere to the dough.
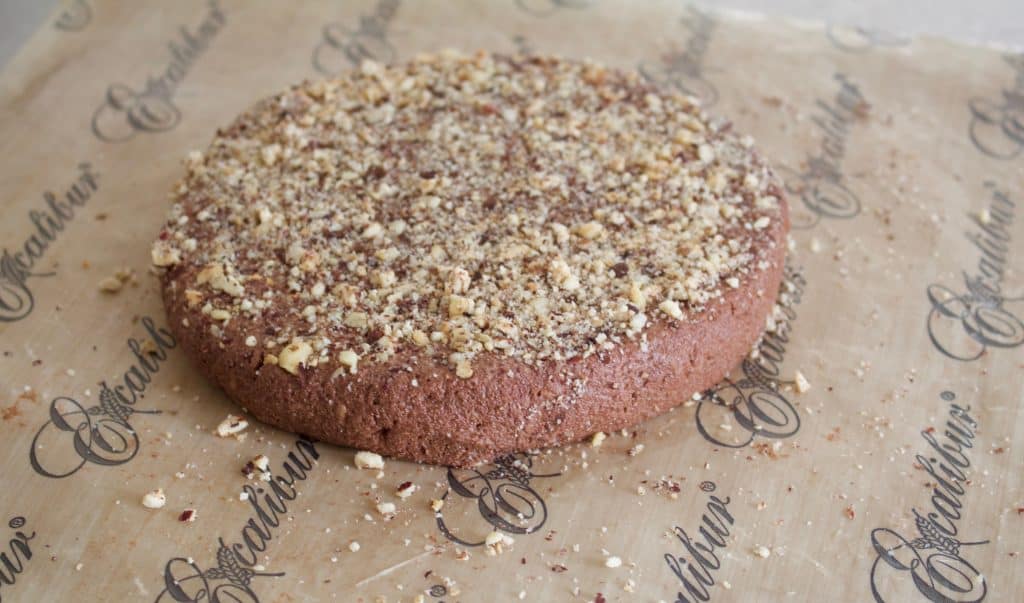
- Wet your knife, or an offset spatula if you’re afraid of cutting the teflex sheet, and cut the dough into 8 slices. Clean and re-dampen your knife between each cut.

- Dry for 10-14 hours at 115f, or until the scones are crisp outside and soft inside.
- Store the scones in an airtight container in the fridge and dehydrate for 30 mins – 1 hour before eating – this will make them warm and also crisp the outside again.
Notes
- These scones are not overly sweet. The sweetness is present to balance the bitterness of the cacao. If you prefer a sweeter scone, add more sweetener.
- When paired with the yogurt, you may find you don’t need them to be sweeter.
- Tamari is used to enhance the depth of flavour from the cacao, but is not essential to the recipe.
Raspberry Lavender “Yogurt”
1/2 recipe of Fermented Cashew “Cheese” – click here for recipe and instructions
50g ( 1/3 cup ) xylitol or honey
40g ( 3 tbsp ) lemon juice
25g ( 2 tbsp ) coconut oil, melted
1-2 drops lavender essential oil
1/4 tsp beetroot powder – optional, for brighter colour
a handful of fresh or frozen raspberries
Method
- Blend all ingredients except raspberries in a food processor or blender. Be sure the cashew cheese is room temp or it’ll cause the coconut oil to seize the mixture.
- Once smooth, taste and adjust as needed.
- You may want to adjust the sweetness by adding more xylitol or some honey.
- Add the raspberries and crush them into the mix slightly so you have some larger and smaller bits for texture.
- Pop in the fridge to set slightly.
- Store in an airtight container for up to 5 days.
Notes
- I use xylitol or honey in this recipe in order to keep it light and bright. If you add colour to an off white base, it’ll be murky looking.
- All essential oils will vary in strength, so add 1-2 drops, taste the mix and then add more if desired. The essential oil doesn’t need to state that it’s “suitable for internal use”, but you can find food grade oils. Always buy the highest quality, organic essential oils, especially when using for internal.

FREE Videos: Start watching and learning today
Are you a visual learner? Yeah, me too. If I can’t be there in person, I love a video. This FREE mini series covers everything you need to know in order to start making professional quality chocolate at home with ease.
Want to know when a new recipe is posted?
You’re busy. I know this. You can’t keep checking my site for new recipes. Sign up for my newsletter and I’ll send you a new recipe every week. Boom!